QuickBooks
Overview
Connecting BART to your QuickBooks Online will allow you to easily export invoices from BART directly to your QuickBooks.
Setup
- Navigate to gear > All Settings > Integrations - Accounting & Tax section > QuickBooks
- Enable feature by clicking the Enable QuickBooks Integration checkbox
- Click the Authenticate button
- Log into your QuickBooks Online account in the new window that automatically opens
- After authenticating, you can navigate back to BART
- Click the Authentication Refresh button to verify your account is authenticated
- Your account will now show as Authenticated
Map Add On
- Navigate to Gear > All settings > Integrations > QuickBooks
- Map your Add On from BART to the Line Items (Product and Services) in QuickBooks. The line item in QuickBooks must be an exact match of the fully qualified name.
- Line items that will be mapped to BART must have a unique name. For example: you cannot use "FBO Fees" as a Product and also a Service in QuickBooks.
- Save
Map Clients
- Navigate to the Quotes tab > Clients > All Clients
- Edit client
- Enter in the name of the client found in QuickBooks
- Save
- If no name is entered, BART will attempt to match the client based on "Client Name"
Setup Users
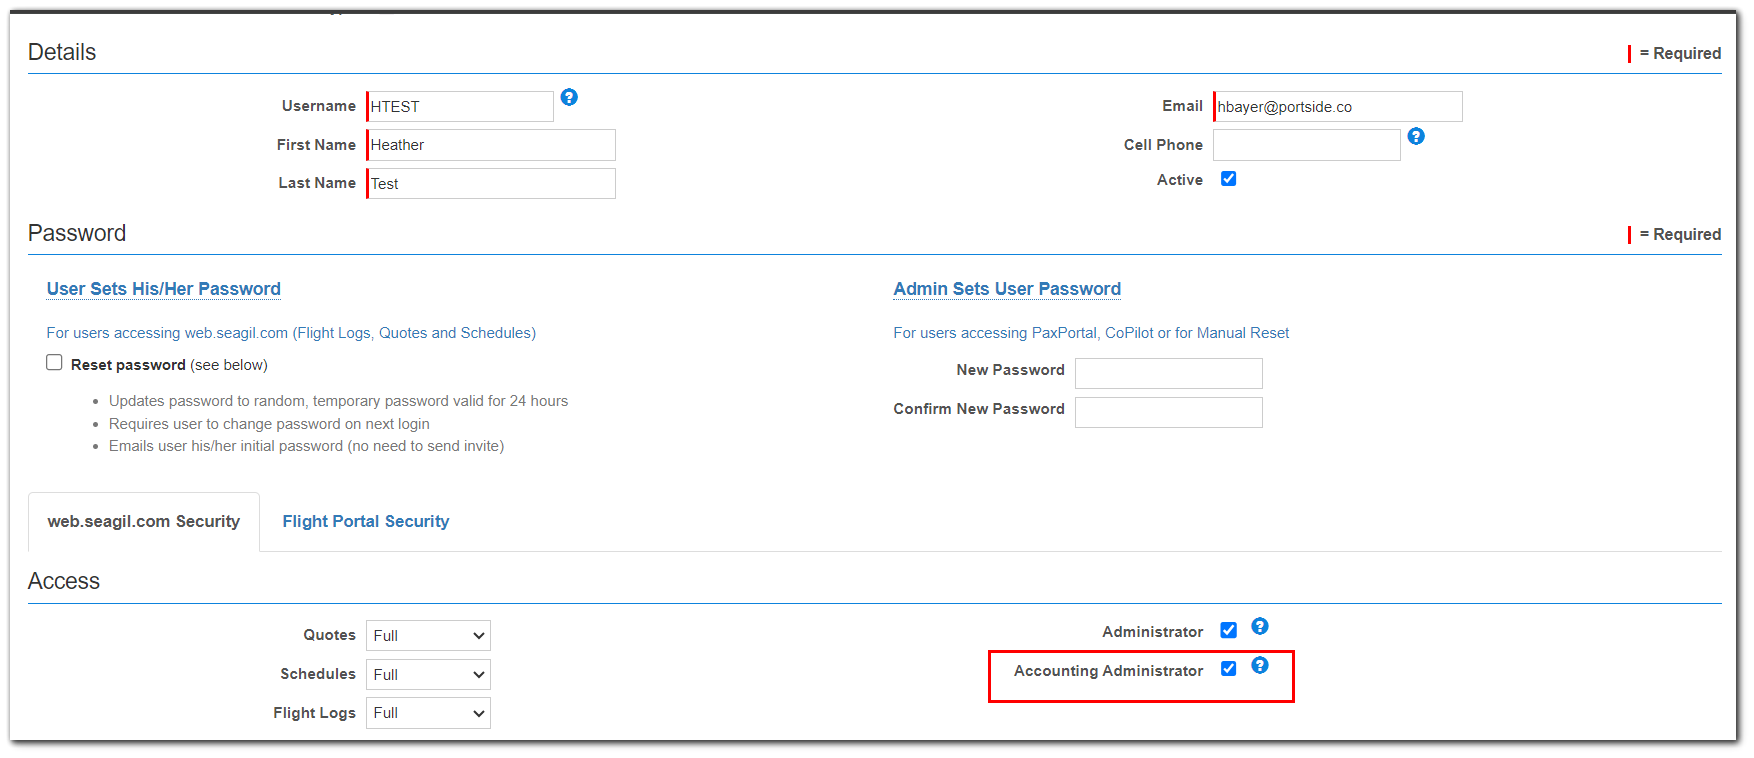
Only users marked as "Accounting Administrator" in their BART user profile will be authorized to send invoices.
Gear > All Users - Edit - check box for Accounting Administrator

Exporting to QuickBooks
- Create invoice BART as usual
- Update status of invoice
- More > "Set Status to "Finalized - Ready for Accounting"
- Save
- Send to QuickBooks
- More > Send to QuickBooks
- Confirm the information to be sent, and click "Send"
- After successful send, save the invoice to automatically update the status to "Posted"
Example of invoice in QuickBooks:

Troubleshooting
- I don't see the option "Send to QuickBooks" on my invoice
- You are not an accounting admin
- You have not enabled to the integration
- You have not authenticated with your QuickBooks Online account
- You have not set the status to the invoice to "Finalized"
- When I try to send an invoice I see a red "not authorized" warning
- Re-authorize your account (gear > all settings > integrations > QuickBooks - Authorize button)
Related Articles
Release Notes: March 11, 2025
? Feature Highlight Status Icons on Flight Logs Calendar Users can now enable Locked and Reviewed icons directly on the Flight Logs Calendar for improved visibility. New Setting: ? Gear > All Settings > Programs > Flight Logs - General section ...